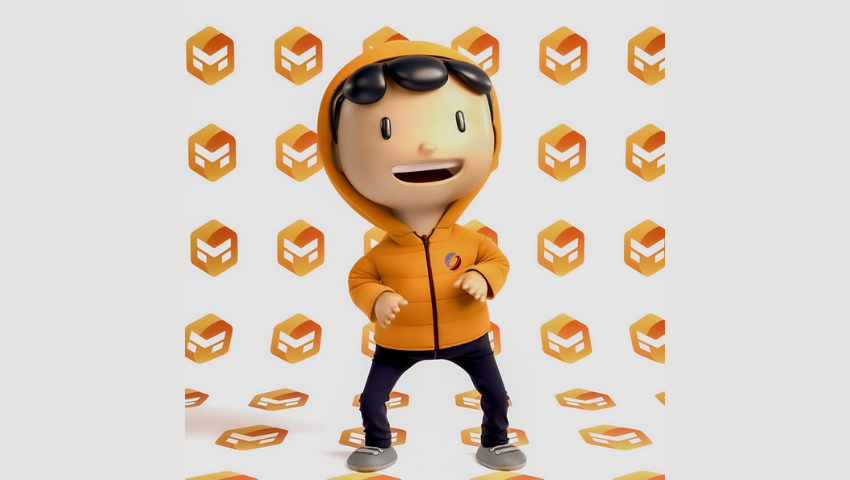
This article, written by Brandon Yu, was sponsored by Marvelous Designer, a supporter of the SIGGRAPH 2022 Student Volunteers.
Marvelous Designer is best known for realistic cloth simulation. It can produce high-quality 3D clothing in a fraction of the time previously required. In this article, we will use SIGGRAPH’s mascot Pixel as an example and create complete garments for him. As well as demonstrate some key features you will need to understand to make the most out of our software.
The traditional methods of modeling cloth for 3D characters are labor-intensive and time-consuming. Marvelous Designer is best known for realistic cloth simulation, but with practice, the software can produce high-quality 3D clothing in a fraction of the time previously required. Typically, you will see these workflows applied to more realistic characters. In this article, we’ll show that Marvelous Designer can also be used to create garments for stylized characters. We will use SIGGRAPH’s mascot, Pixel, as an example and demonstrate key features to make the most of our software.

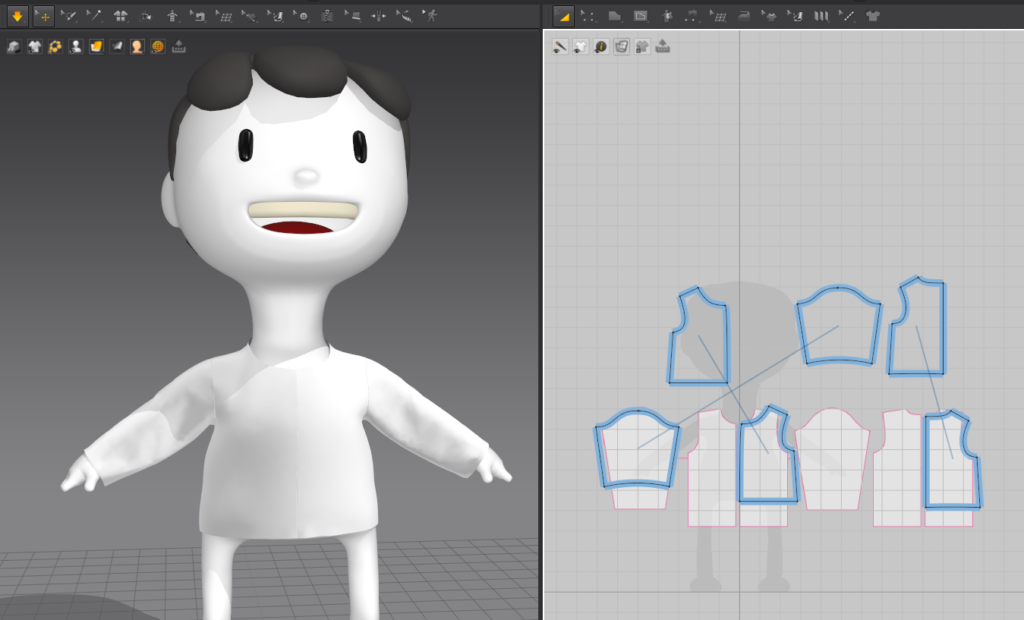
First, we’ll import Pixel into Marvelous Designer as an avatar. The model has skeleton information, so we can import the file as an FBX which allows you to create different poses. Pixel assets downloaded from the SIGGRAPH 3D Model Portal do not have an underlying body, so we made a collision mesh beforehand.
Marvelous Designer’s strength is that it is based on real-life, pattern-making concepts. A great place to start is tracing (non-copyright restricted) patterns first. This is easy to do by right-clicking in the 2D workspace and selecting “Add Background Image.” Choose your pattern image and move it over the silhouette of your character in the 2D workspace. The best practice is to match the shoulder length of the pattern to the shoulder length of the avatar’s shadow. In this example, it is going to be 48% scale. We can use the polygon tool to trace the pattern image. Afterward, adjust the shape of the pattern to fit Pixel’s body as needed.
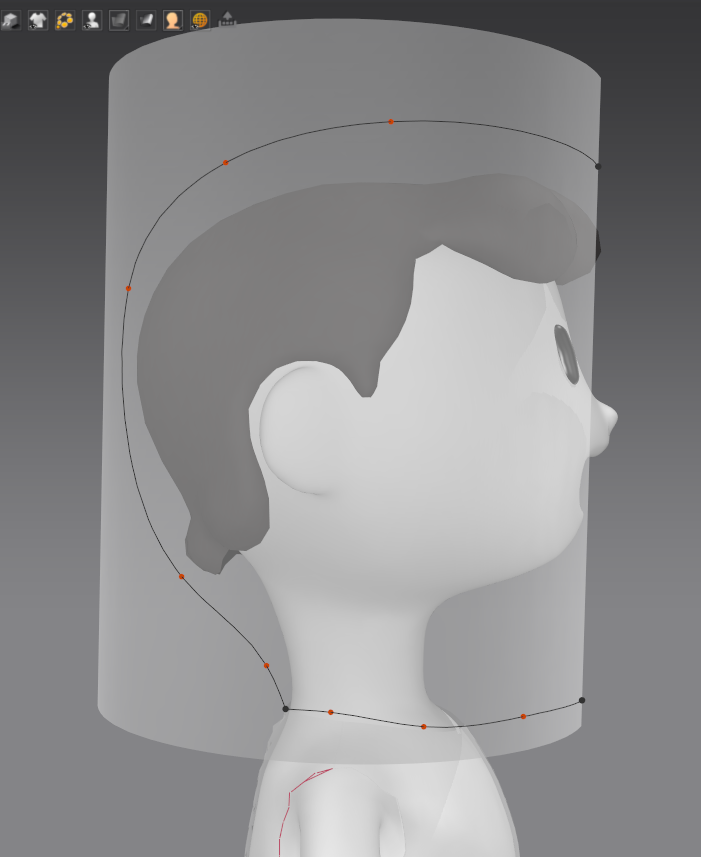
Onto the hood next. Use the rectangle tool to create a rectangle plane that’s the same size as the head. Use the arrangement points option in the 3D window to place the rectangle around Pixel’s head. Turn the garment display to “translucent,” and use the “line (3D pattern)” tool to trace the shape of the head and match the collar line of the shirt. Convert the line into an internal shape, cut out, and delete the excess pattern.
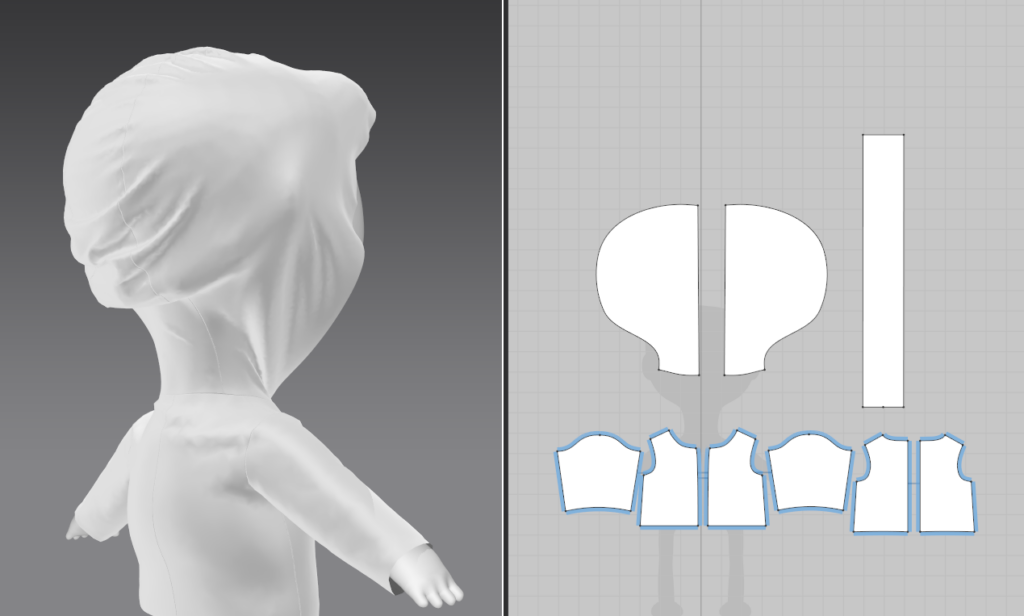
Duplicate the pattern with symmetric sewing to the other side, then sew it to the shirt and simulate. You can see that the back of the hood has many wrinkles. If you don’t like them, we can use a tailoring trick. Select the pattern outline of the hood, offset it as an internal line for 100mm, and cut it out. Create a rectangle the same length as the previous line, and sew it in the center as shown in the image below.
Now that the main shape of the coat is constructed, let’s puff it up. After creating internal lines across the body, select all pattern pieces, right-click, and choose “layer clone (over).” This creates a clone over the original garment and now all the pattern edge lines and internal lines are sewn together automatically. Add pressure values of -30 to the lower layer and +30 to the top layer. Click simulate, and the coat is inflated.
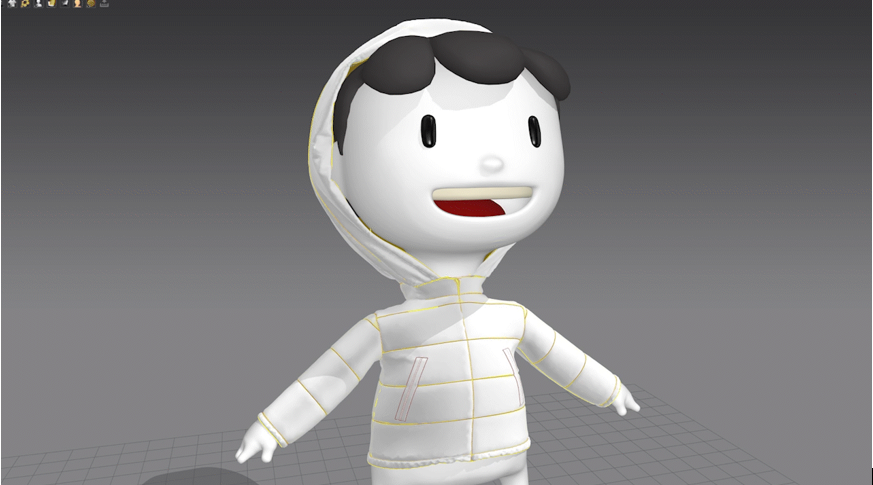
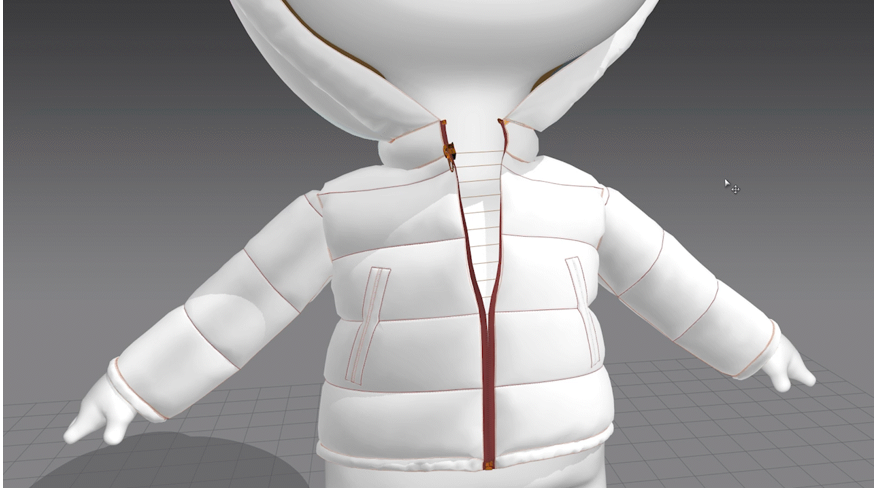
The last touch for the puffer coat is adding a zipper. Using the zipper tool, left-click to add points at the pattern edge lines. Double-click to finish one side of the zipper, and repeat on the other side. After its creation, you can modify the shape, material, and color of the zipper.
Unlike normal humans, Pixel is very stylized. To accommodate this, we can use the auto-fitting tools to automatically adjust existing garments to fit Pixel.
We will need to create a fit suit for Pixel first. Open Pixel in a new project, select the fit suit icon in the 3D toolbar, and follow the on-screen instructions. After the fit suit is created, import the basic pants from the library and click “Autofit” in the 2D window. Please note that the default garments from the library already have fit suit information.
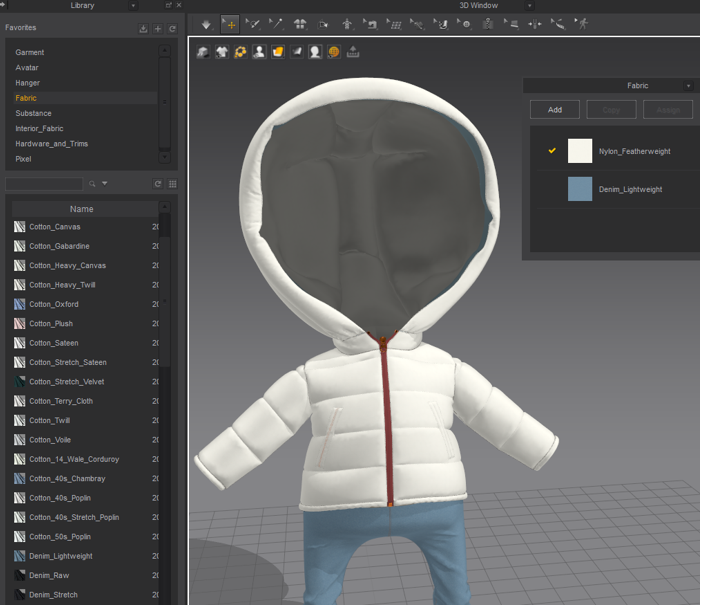
Before adding finishing touches to the garment, let’s change its fabric properties. In the “Library: Fabrics” folder, you can find a wide range of fabric presets to choose from. Here we use “Nylon Featherweight” for the coat and “Denim Lightweight” for the jeans. You can edit the fabric properties yourself to make the fabric stylized if you want less of a true-to-life fabric. For example, the nylon fabric preset was used as a base and the “bend stiffness value” was increased for both weft and warp.
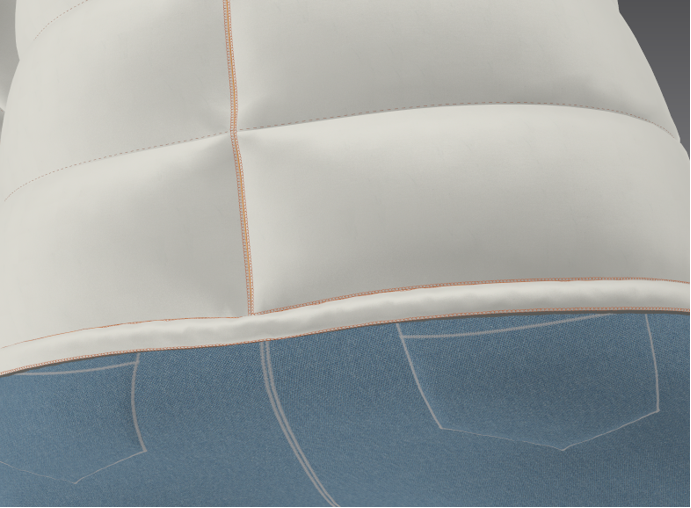
Another detail we can add is topstitching at the pattern edges and internal lines.
Now that we are done modeling the garment, let’s change the pose. Since we imported Pixel as an FBX with skeleton information, we can translate and rotate the joints by changing the avatar display in the 3D window to “Show X-Ray Joints.” If you’ve already created a pose or, in my case, downloaded a pose from Mixamo, you can import the character as an FBX with the pose and save a pose file to access later. Import the pose file you created for Pixel. You can see that the simulation starts and the joints rotate in a smooth motion.
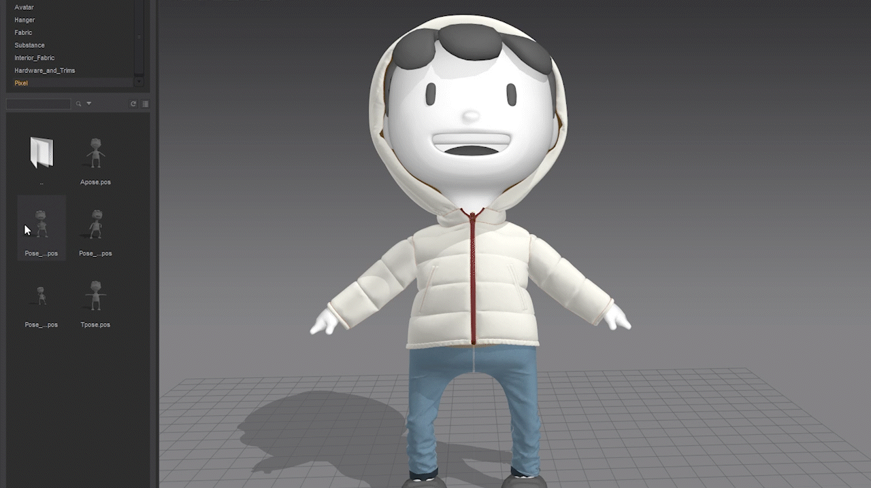
After posing, decrease the particle distance to five for all pattern pieces. This will create accurate wrinkle details when working at human scale while making the mesh denser. With denser mesh comes slower simulation, so it’s best practice to use a higher particle distance while working and lower it at the end.
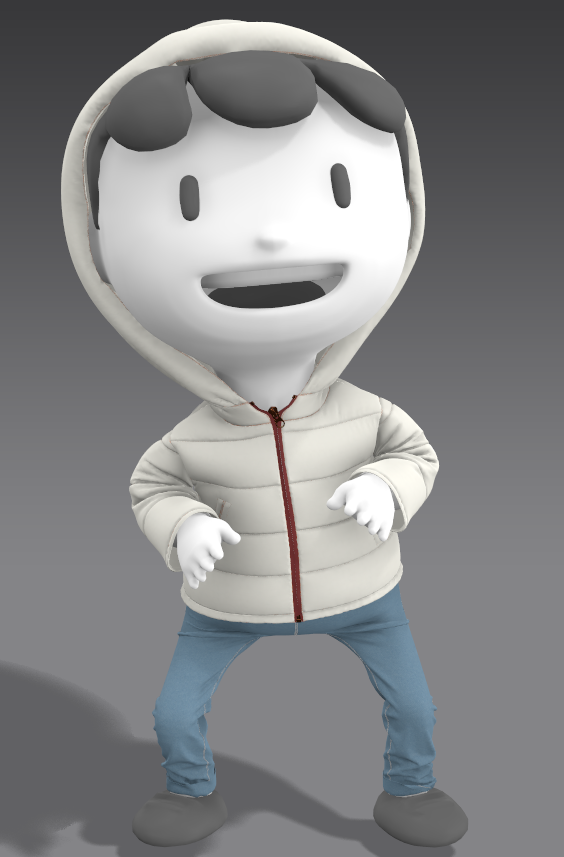
Marvelous Designer can also handle UV layout, texture, and remeshing. Let’s start with the UV.
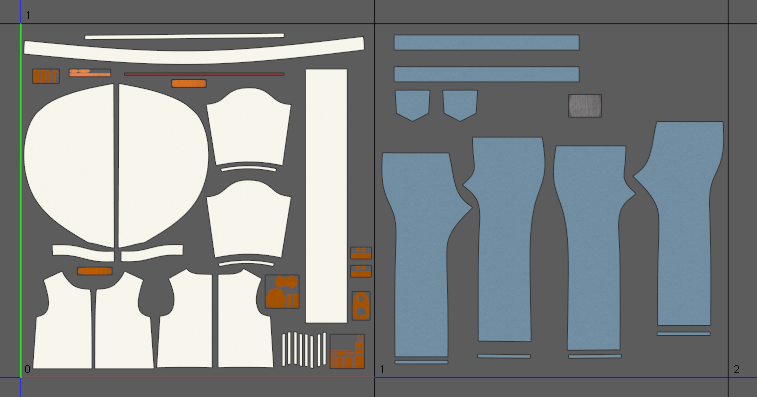
Go to the UV editor by clicking on the arrow on the top of any workspace panel. Right-click on an empty space in the UV editor and choose “Reset UV to 2D Arrangement,” then place each UV shell into the UV squares.
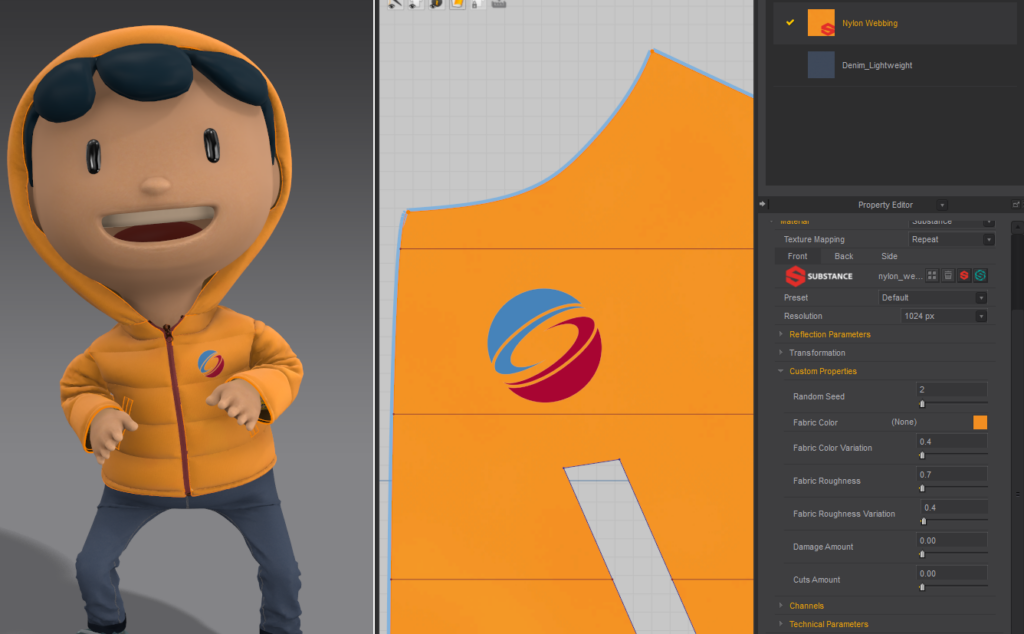
Each fabric preset from the library has a default diffuse map and normal map. You can overlay a color on top by changing the fabric color, but if you want to make it fancy we also support substance materials. Import a substance .sbsar file by dragging it onto the fabric. In the property editor, you can access the parameters created in substance designer. You can also add a graphic to your garment using the graphic tool. You can see here we added the ACM SIGGRAPH logo.
Lastly, you can Retopologize. Using the patch topology tool, you can set the number of divisions of each edge to quickly lay out quads or use the “create topology tool” to draw each quad. When placing a point on an edge line, a reference point will be created based on the sewing relationship.
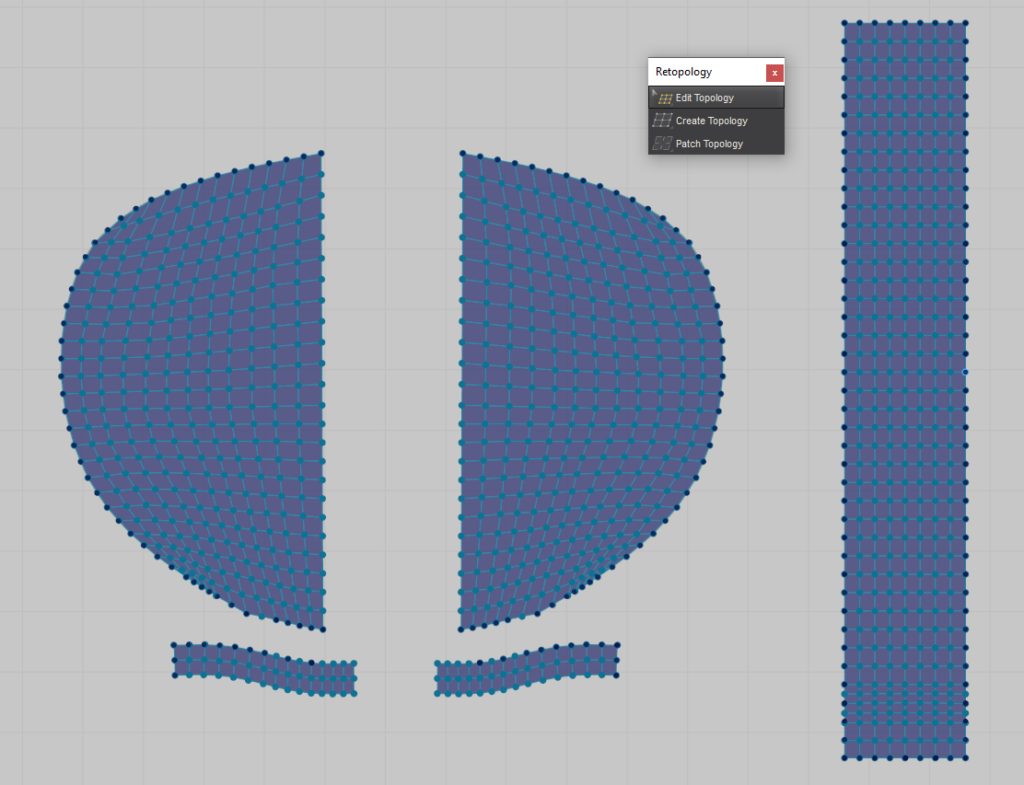
After you are finished, right-click and choose remesh/remesh all (duplicate) to duplicate a new mesh based on the new topology. Or remesh/remesh all (replace) to delete the existing pattern and create a new mesh based on the newly drawn topology.

Here’s the finished SIGGRAPH Pixel mascot rendered in Arnold. Thank you to the SIGGRAPH Student Volunteers Subcommittee for providing us with this platform and allowing us to use the Pixel mascot model! I would also like to thank Megan Dellario, Eric Hinkley, and Layla Jo for your help in making this article.

Brandon Yu is the community manager/3D designer for Marvelous Designer.
